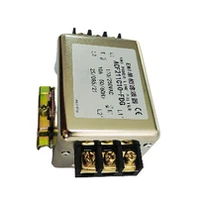
Hey there! As a supplier of RFI EMC Filters, I'm super excited to share with you how to install these nifty devices. Whether you're a DIY enthusiast or a professional in the electronics field, getting the installation right is crucial for optimal performance. So, let's dive in!
What is an RFI EMC Filter?
Before we jump into the installation process, let's quickly go over what an RFI EMC Filter is. RFI stands for Radio Frequency Interference, and EMC is short for Electromagnetic Compatibility. An Rfi Emc Filter is designed to reduce or eliminate unwanted electromagnetic interference in electrical circuits. This interference can come from various sources, like motors, switches, or even other electronic devices nearby. By using an RFI EMC Filter, you can ensure that your equipment operates smoothly without being affected by external electromagnetic noise.
Why Install an RFI EMC Filter?
There are several reasons why you might want to install an RFI EMC Filter. Firstly, it helps to improve the performance of your electronic devices. When there's a lot of electromagnetic interference, it can cause glitches, malfunctions, or even permanent damage to your equipment. By filtering out this interference, you can extend the lifespan of your devices and keep them running at their best.
Secondly, many industries have strict regulations regarding electromagnetic emissions. Installing an RFI EMC Filter can help you comply with these regulations, which is especially important if you're selling your products in the market. It shows that you're committed to providing high-quality, reliable products that meet industry standards.
Types of RFI EMC Filters
There are different types of RFI EMC Filters available, depending on your specific needs. One common type is the EMI/rfi Power Line Filter. This type of filter is designed to be installed on the power lines of your equipment to reduce electromagnetic interference that can be carried through the electrical supply.
Another type is the 2-line Filters. These filters are typically used in applications where you have two lines of electrical current, such as in some audio or video equipment. They help to isolate and filter out interference between the two lines, ensuring clean and clear signals.
Tools and Materials You'll Need
Before you start the installation process, make sure you have all the necessary tools and materials. Here's a list of what you'll typically need:
- RFI EMC Filter: Of course, you'll need the filter itself. Make sure you choose the right type and size for your application.
- Screwdriver: You'll need a screwdriver to remove and install any screws that hold the filter in place.
- Wire Cutters/Strippers: These tools are essential for cutting and stripping the wires that you'll be connecting to the filter.
- Electrical Tape: Use electrical tape to insulate the connections and prevent any short circuits.
- Mounting Hardware: Depending on the type of filter and your installation location, you may need some mounting hardware, such as brackets or screws.
Step-by-Step Installation Guide
Now that you have everything you need, let's go through the step-by-step installation process.
Step 1: Turn Off the Power
This is a crucial step to ensure your safety. Before you start working on any electrical equipment, always turn off the power supply. This will prevent any electrical shocks or short circuits while you're installing the filter.
Step 2: Locate the Installation Point
Next, you need to find the right place to install the RFI EMC Filter. This will depend on the type of equipment you're using and the specific requirements of the filter. In most cases, you'll want to install the filter as close as possible to the source of the electromagnetic interference. For example, if you're installing a power line filter, you'll typically want to install it near the power input of your equipment.
Step 3: Mount the Filter
Once you've located the installation point, it's time to mount the filter. Use the mounting hardware that came with the filter or the appropriate brackets and screws to secure it in place. Make sure the filter is firmly attached and won't move around during operation.


Step 4: Connect the Wires
Now comes the wiring part. Carefully read the instructions that came with the filter to determine which wires need to be connected. In general, you'll have an input side and an output side. Connect the input wires from the power source to the input terminals of the filter, and then connect the output wires from the filter to the equipment you're protecting.
Use the wire cutters/strippers to cut and strip the wires to the appropriate length, and then connect them to the terminals using the screws or connectors provided. Make sure the connections are tight and secure to prevent any loose connections that could cause problems later on.
Step 5: Insulate the Connections
After you've connected the wires, use electrical tape to insulate the connections. Wrap the tape around the exposed wires and terminals to prevent any electrical contact with other parts of the equipment or the environment. This will help to prevent short circuits and ensure the safety of your installation.
Step 6: Double-Check Your Work
Before you turn the power back on, take a few minutes to double-check your work. Make sure all the connections are secure, the filter is properly mounted, and there are no loose wires or other potential hazards. It's always better to be safe than sorry!
Step 7: Turn On the Power
Once you're satisfied with your installation, it's time to turn the power back on. Check to see if your equipment is working properly and if the filter is effectively reducing the electromagnetic interference. If you notice any problems or if the equipment isn't working as expected, turn off the power again and double-check your installation.
Troubleshooting Tips
Even if you follow the installation process carefully, you may still encounter some issues. Here are some common problems and how to troubleshoot them:
- No Power: If your equipment isn't getting power after installing the filter, check the connections to make sure they're secure. Also, make sure the filter is properly rated for the voltage and current of your equipment.
- Interference Still Present: If you're still experiencing electromagnetic interference, make sure the filter is the right type and size for your application. You may also need to check the grounding of your equipment and the filter to ensure proper shielding.
- Overheating: If the filter is overheating, it could be a sign of a problem with the installation or the filter itself. Check the connections to make sure they're not loose, and make sure the filter is properly ventilated.
Conclusion
Installing an RFI EMC Filter is a relatively straightforward process, but it's important to do it correctly to ensure optimal performance and safety. By following the steps outlined in this guide and using the right tools and materials, you can easily install a filter and enjoy the benefits of reduced electromagnetic interference.
If you have any questions or need further assistance with choosing or installing an RFI EMC Filter, don't hesitate to reach out. As a supplier, we're here to help you find the best solution for your specific needs. Whether you're a small business or a large corporation, we can provide you with high-quality filters and expert advice. Contact us today to start the procurement process and take your electronic equipment to the next level!
References
- Manufacturer's instructions for the RFI EMC Filter
- Industry standards and regulations regarding electromagnetic compatibility